As Amazon added MLK Jr day as a corp holiday this year, I decided it would be a good day to do some testing on the station. And so I loaded up the car and headed west, to test the sensors that I do not have on my station at home. So that would be the Leaf wetness, soil moisture, soil temperature, UV, and Radiation. Now, really I didn’t *need* to do this, as based on the spec sheets, they should all function very similarly.
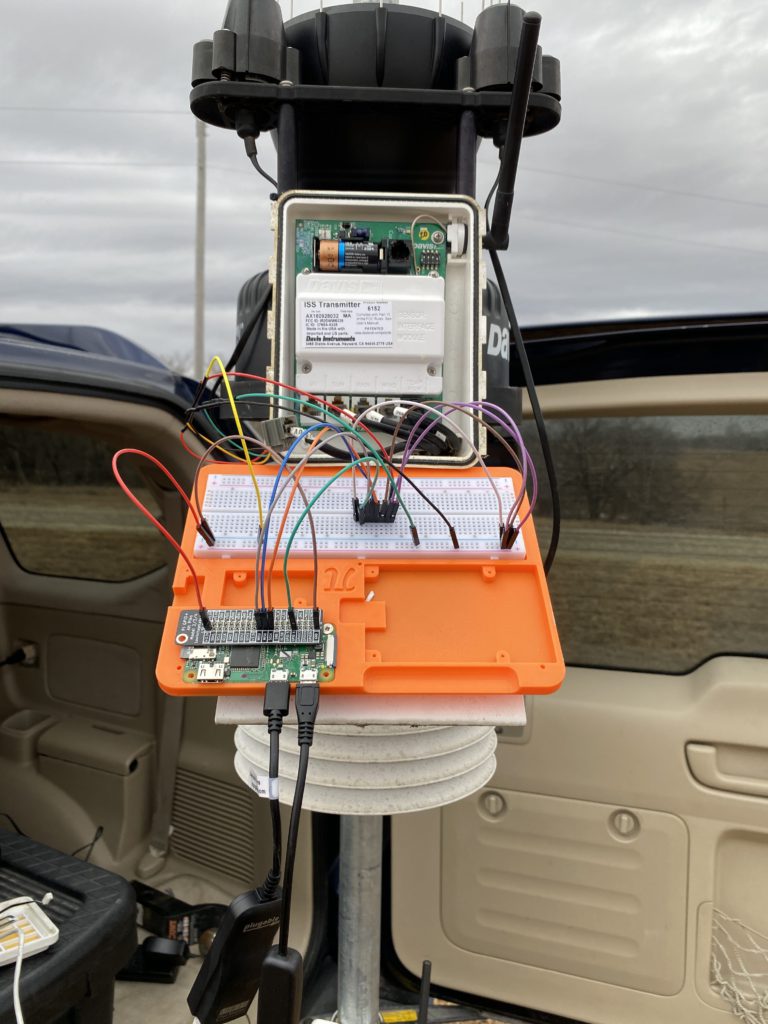
For example the UV and Radiation sensor both output a voltage. So it’s a three pin setup, piping that through the ADC provides a good value, just like the wind direction does. But I wanted to test that.
The soil temp/humidity sensors are resistive, and so I could really just use any resistive sensor. I tested it with a Photoresistor ahead of time to make sure.
My measure of success for each one was that the values were constant, and they were! It was quite cloudy, so i expected a low value for Radiation and UV, which I did see that. Soil moisture and temp i wasn’t really sure what value to expect, but again, the values were constant, which is about right for sensors buried in the ground.
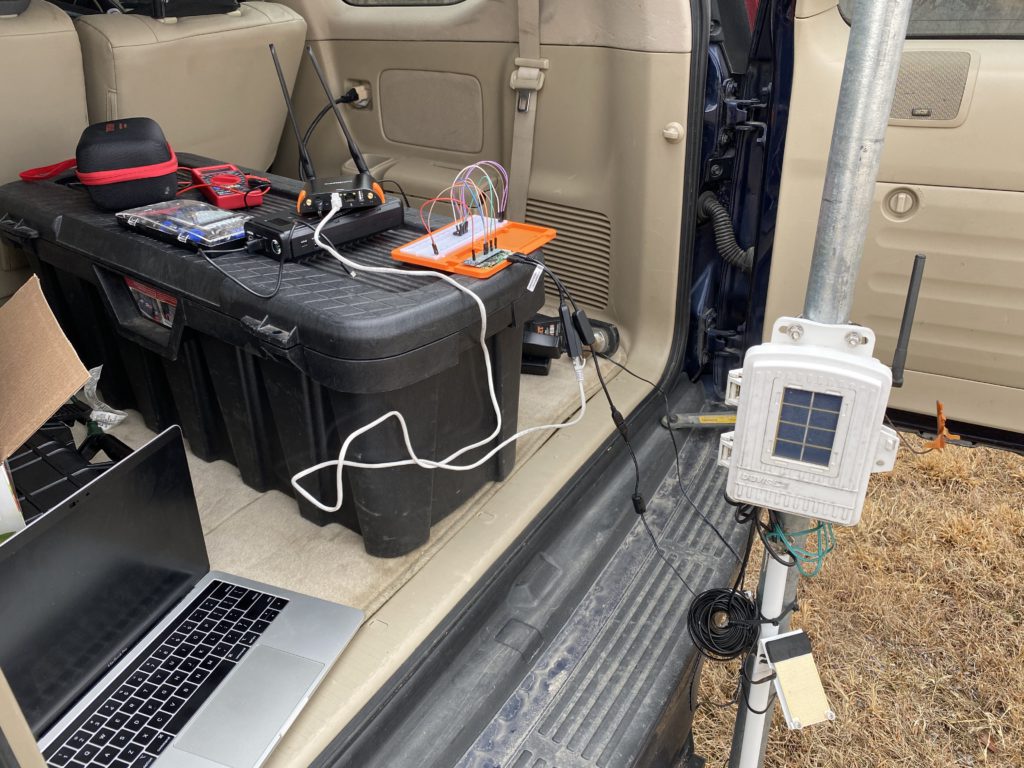
In terms of networking I also tested out the WAN on Wifi functionality of the CradlePoint. I used a Verizon Mifi from work and set it up on the Cradlepoint. From there I was able to connect ethernet to the PI via a USB Adapter and I had internet! So not only was I able to SSH into the Pi from my Macbook, I was also able to get internet on the Pi. I still need to test failover as the Cradlepoint does have a Straight Talk SIM card in it (That does work) so I need to verify if the Wifi drops, it will connect up to Verizon via Straight Talk.
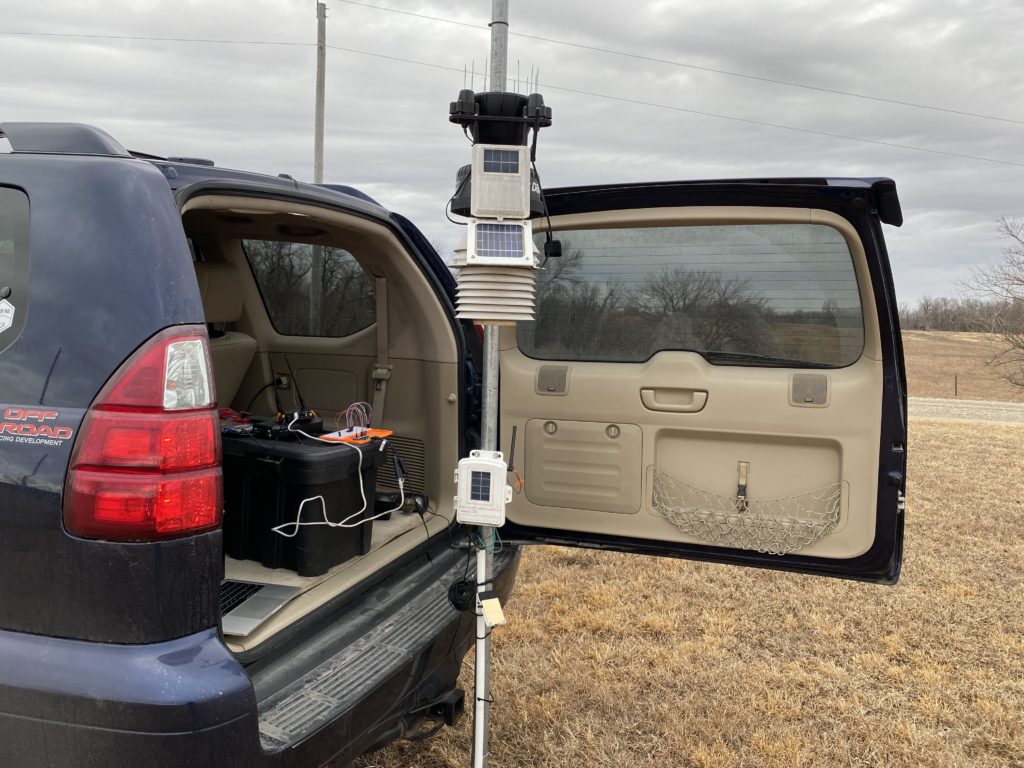
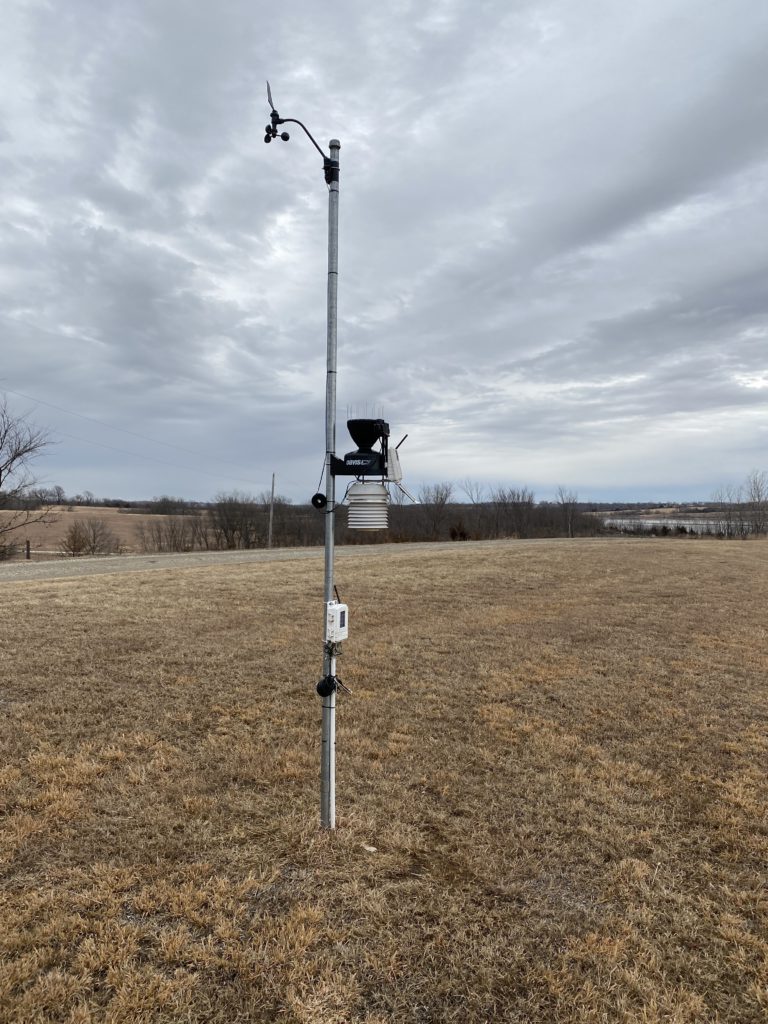
Finally I’ve been thinking about layouts. Here is a photo of the whole station:
The sensor RJ11 cables from the main ISS board are way too small, and I’m not sure I want to extend a bunch of cables. Plus as I went through with the RJ11 previously, you gotta be careful with the wiring. So I think i’m gonna have a PCB for the Soil Sensor enclosure, and the main sensor pack. These will bolt up right where the existing Davis boards do, and will have RJ11 for the main pack, and for the soil moisture/temp board, have screw terminals since those are just two wire sensors. Plus an RJ11 for the leaf wetness.
For connecting I had to think about how to do that. If I use I2C and some ADS1115 ADC boards, I can get away with using either a 6 pin RJ11 cable between the boards, or a RJ45 Cat6 cable with 8 pins. For the main board I only need 6 pins, and for the soil/moisture, I would just need 4. Cat 6 would definitely allow more room for expansion, and I can make custom length cables since I have a ton of Cat6 stuff lying around. So may just go that route. Then I can mount the battery pack with the Pi and networking gear closer to the bottom of the pole, or just wherever is convenient.
I’ve also made progress on the software side of things. I plan on a separate blog post about that and how i’m gonna do that, but I still have a few more decisions to make on that.