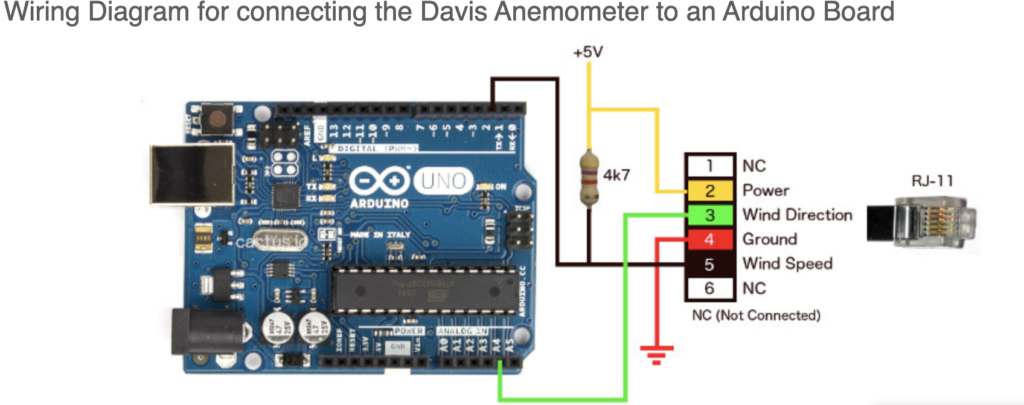
I started tackling the wind measurements next. Yet it’s ended up being very frustrating because i’m a dingus and blindly followed directions vs actually thinking logically. What do I mean? Well i’m talking about the wiring when it comes to the anemometer. See I had found this image via http://cactus.io/hookups/weather/anemometer/davis/hookup-arduino-to-davis-anemometer:
In order to test out my sensors, I’d been using an adapter like this
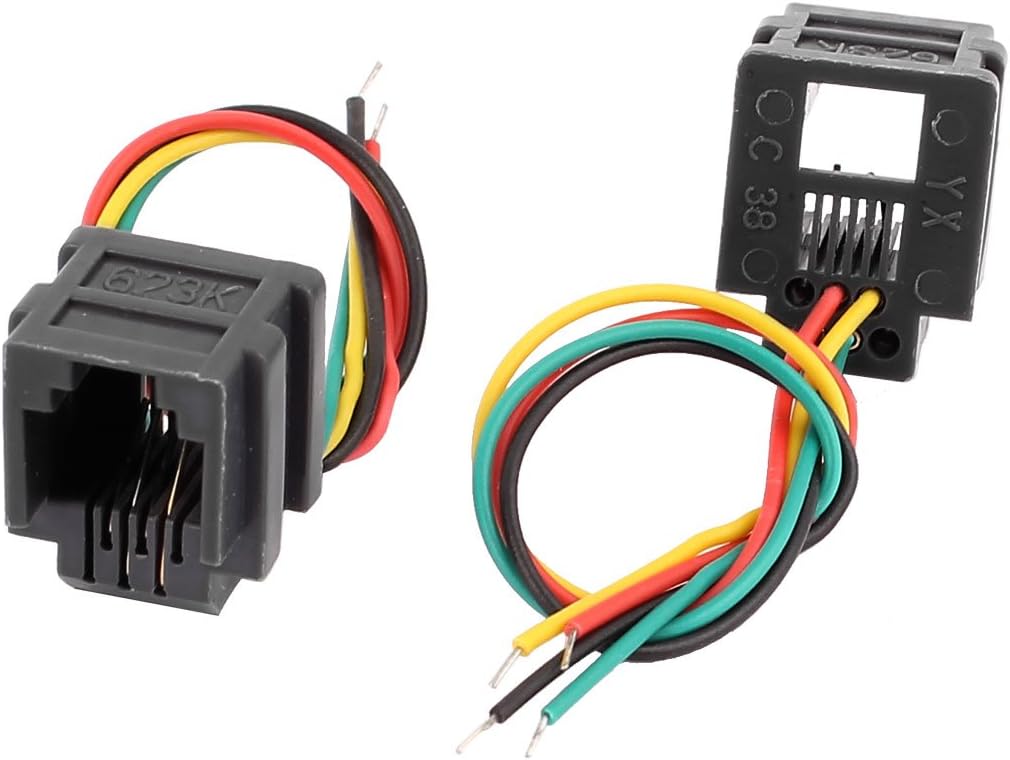
I soldered on some breadboard jumpers to each lead that matched the color. This meant I could plug RJ11 into the breadboards and use all my sensors. Great! Except for one tiny issue….. And I didn’t think about this until about 8:30 tonight after fighting with it for a good 90 minutes. The colors don’t match the colors on the Davis cable. So when I was plugging it into my board using the connections from Cactus.io, It was not the right connections. Everything is reversed!
I knew it had to be my wiring because even with a multimeter I tested things and it came back with no voltage. It just didn’t make sense. So I kept digging and digging and I came across this document and in particular this passage:

Huh. Well that makes sense. This also makes me realize why I burned up my stock Davis Temp/Hum sensor in part 3. Apparently it was not as forgiving about incorrect wiring… Upon reading this page I realized I was not dealing with a straight cable and this was a reversal situation. So I took a look at the colors on the RJ11 end of the Anemometer cable, and then mapped them to the correct colors on the cable. What i came up with was this:
Davis Yellow (Power) is Black
Davis Green (Wind Direction Signal) is Red
Davis Red (Ground) is Green
Davis Black (Wind Speed) is Yellow.
So once I went back downstairs and wired it up like that, it worked! Using code from here I got a basic script working that would show the voltage change as I rotated the wind vane around. Hurray! Coupled with the wind speed switch working as designed, I now have working wind measurements. Considering I bought a large pack of those RJ11 connectors, i’m still gonna use them, but i’m gonna solder them up with the correct color jumpers to match the input so it is straight through to the breadboard.
So that’s exciting. I also got word today my SHT35 will arrive tomorrow along with some project pcbs. This is exciting as I can combine the SHt35 and BMP180 onto the same board and test that functionality out. Once I verify on the breadboard everything will work as designed, I can start building out a prototype of the real new temp/humidity board. I also plan on taking a trip out to the production weather station this weekend and doing some live prototyping with soil moisture/temp sensors and UV/SRAD sensors. Given I now understand ADC, it should be pretty straight forward, but I still gotta make sure I test everything!